 Menu
Menu
AX 2012 Models & Events Part3: The Power Combo!
Filed under: #daxmusings #bizapps
In the conclusion of this 3-part blog article, I will finally get to my point. We will walk through the event code and models and create an example where we have two models that both touch the same table, the same form AND the same method (by means of handlers). In the end, we will import both those and they will install themselves, without any merging necessary. They can be used independently, or together. Hopefully you will understand the needed change in thinking and designing code to make this possible.
Part 1: Model Architecture Part 2: Events Part 3: The Power Combo
So, let’s get down to business. We will create two models (separately, one at a time), each will add a new field to the CustTable table, each will add that field to the customer details screen, and each will add code to the validatefield method on the custtable. We will create one model, do the customization, remove the model, create the other model, do the customization, then import the old model back in. If the promise of models and events holds, and if we create our customizations the right way, we can add and remove these models in whatever sequence we want, as many times as we want, and there will be no merging necessary at all. Just a plain old install, as if you would install an app on your phone.
If you are attempting this walkthrough on the public beta, there are potential issues. Remember that is a pre-release which is 5~6 months older than the version I have created this exercise on. If there are issues with the beta, please let me know in the comments. And be patient and try again when RTM is released (we’re getting close!).
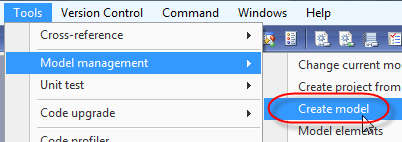
Each layer in AX 2012 has a default model. For VAR, this would be the “VAR Model”, CUS is the “CUS Model”, etc. So first thing we need to do, regardless of what layer you are test this in, is create a new model so we can separate our code. Open AX in the developer workspace (add “-development” in your client configuration or use shortcut CTRL+SHIFT+W in the regular mode to open the developer workspace). From the Tools menu, select Model Management / Create Model.
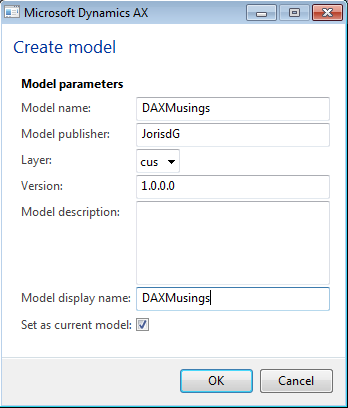
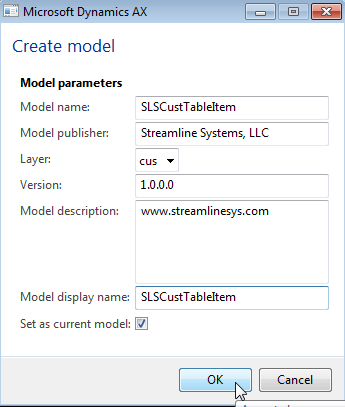
Enter the information of the model. You don’t have to copy my settings exactly, just make it unique enough, our next model will need a different name (and remember what is what). I decided to name this first model DAXMusings after my blog, and the publisher is myself. Make sure to give it a display name as well, and set it as your current model. As opposed to layers, you can change “active” models on the fly (only within the layer you’re logged into, though).
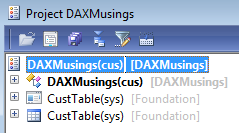
You will get a nice infolog message indicating your model was created successfully. Other ways to create a model is from the command line using the AXUTIL command-line tool. If the tool is not in your path, it’s located on your server, in the 64-bit program files under “management utilities”. Remember though this is a separate item in the AX 2012 installer. Next up, we’ll create a new project and drag the CustTable table and CustTable form into it. We will also create a new class, which, to keep it easy, I will also call DAXMusings.
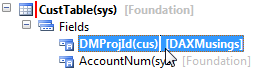
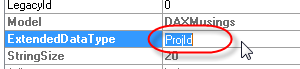
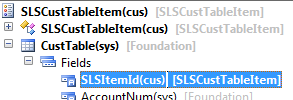
Ok, so here’s the story. We will add a field on the custtable to contain a project number (string extended data type “ProjId”). We will validate that field to make sure the project status is “In Process” (granted, this is a silly, useless example, but for the sake of the exercise, let’s pretend it’s business critical!). Traditionally, we would add code to the validateField method on the CustTable. This would be a one-liner calling a method somewhere else, or we would just add all the code in there, doesn’t matter. However, in AX 2012, we can segregate our customization easily by using a pre/post handler. In that case, come the next hotfix rollup or AX release, we need not be concerned about “upgrading” our over-layered method, because it won’t be over-layered at all. And, as we will see here, when we install another model that also needs to hook into the validateField, we can just install it without investigating both code sets and merging. So, let’s get down to it. First, we add our field. To avoid more conflict, we will prefix our customization objects with DM (for DAX Musings). Add the field DMProjId, and set the extended data type to “ProjId”.
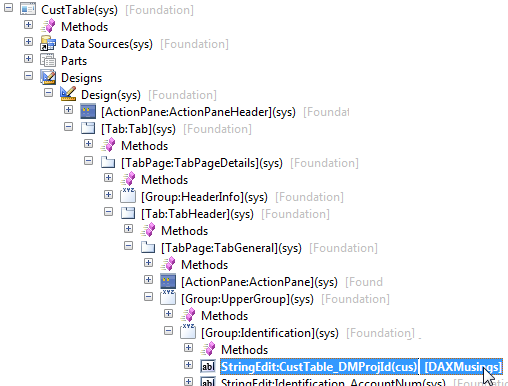
We will add this field on the CustTable form, on the general tab. It doesn’t really matter where you put it, the point is we’re customizing the screen by adding it.
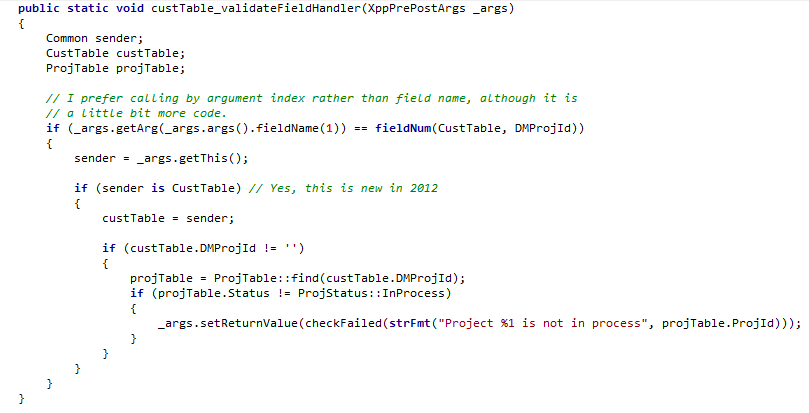
Next, we will add a pre/post handler method to attach to the CustTable.validateField method. We will use the standard pre/post handler, since that allows us to change the return value. In case of the validateField, changing the return value makes sense. By default, it will return true, and if one of the validations fail it will set the return value to false. So, if we (and consequent other handlers) don’t touch the return value unless we want to set it to false, it doesn’t matter what order handlers subscribe (let that sink in - I’m making sense, really). I will spare you the details on the code I’m writing. You can just either set the return to false or true to speed this up, I’m still trying to maintain the illusion of a useful mod here.
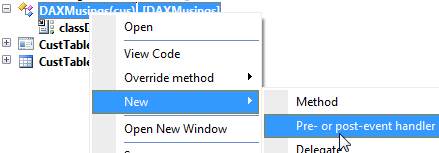
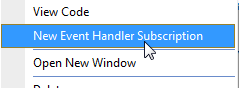
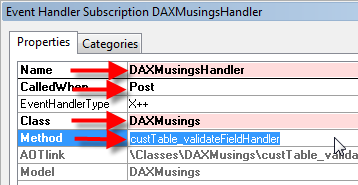
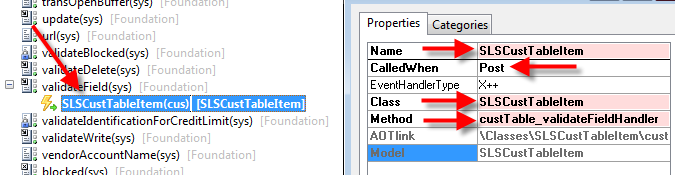
To hook up this method, drag&drop the method onto the validateField method of the CustTable, or right-click the validateField method and select “New Event Handler Subscription”. Make SURE to rename the subscription to a unique name, and set the “CalledWhen” property to “Post” (if you select pre, the return value will be reset to the default TRUE of the original validatefield method!).
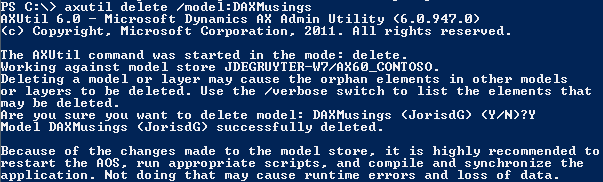
Feel free to open the CustTable form and test the validation. Trust me, it works! :-) Great, so now we have our DAXMusings model. Let’s export this to an AxModel file, and remove it from our system. To do this, open up a command prompt or powershell (I prefer the latter after discovering the joys of powershell). We will use AXUTIL to export, and then remove the model.

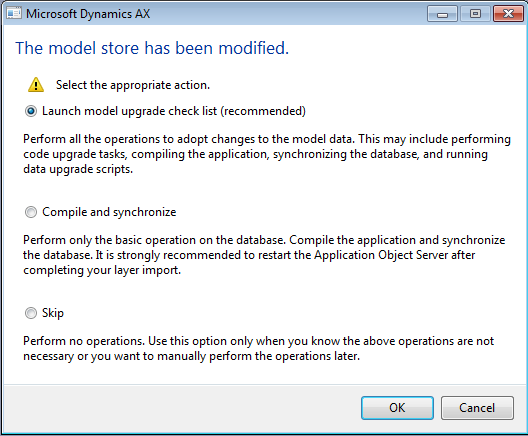
The tool will ask you to restart the AOS (think: indexing of objects/layers). After you restart the AOS and fire up your AX client again, you will get a prompt asking you to synchronize and compile. Obviously, you should. In our case, the table needs to drop a field, and the validateField method of the CustTable table needs to be recompiled (remember the pre/post handler is compiled as if it were part of the original method, so a recompile is definitely needed here - weird and bad things happen otherwise).
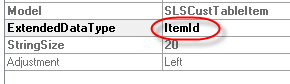
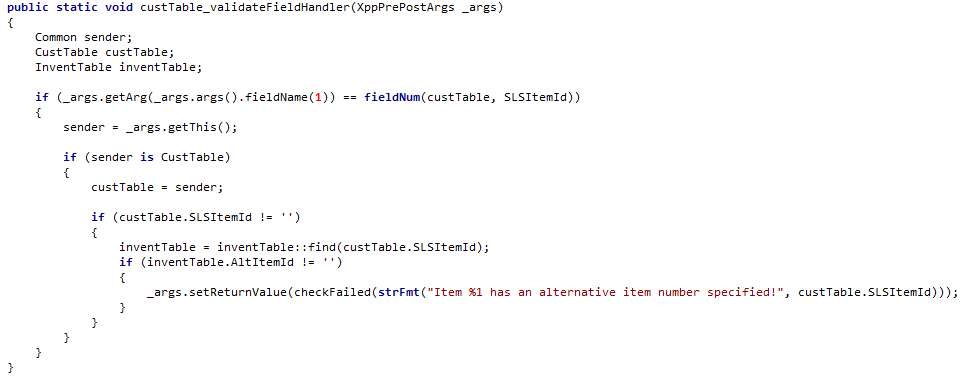
So, now that we’re back to a virgin AX with foundation, let’s repeat the steps. This time, we’ll sneak in some clandestine advertising for Streamline Systems in our model name and description. As a field, we’ll add an item number (string extended data type “ItemId”) and validate that it does not have an alternate item number (field AltItemId should be blank on the InventTable). Otherwise, we’re pretty much repeating steps here (fast forward the screenshots!).
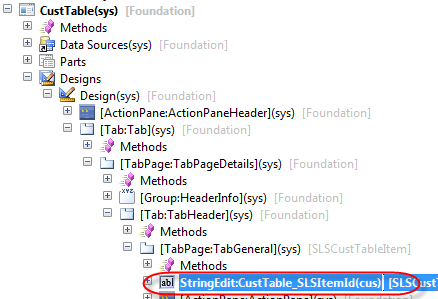
Add a field Set the Extended Data Type to “ItemId” Create pre/post handler method on the new class Subscribe the new method to the validateField on CustTable Add the new field to the CustTable form
Alright. Now that that’s over, think about what we are about to do. We have an installed model customizing the CustTable, adding a field to a form, and performing a validation in code by adding code, but by using pre/post handlers rather than actually modifying the base code. So, let’s put this new architecture to the test and install our old DAXMusings model back into this same environment.
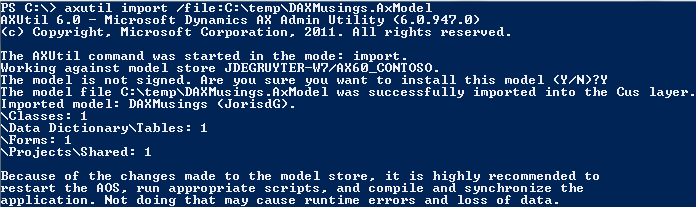
Now, restart the service, and let’s fire up AX. Again, it will prompt about model changes. Synchronize and compile people (seriously, compiling is an absolute must here)! So now, before you test the mod, what do you think will happen?
YES! Success! (admittedly, I was sweating a little bit… all this typing, imagine if this hadn’t worked).
Open the CustTable form… Both the fields are there!
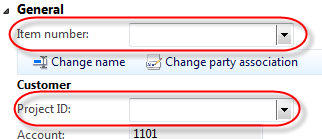
Try to pick an item with an alternative item (3004 in demo data). Try to put in a project not in process. (if you are getting unexpected results… did you compile?)
Enjoy the power of this new architecture. If you have doubts, feel free to import/export these models in other environments that haven’t been customized at all. You can also try to ACTUALLY customize the validateField method, you will notice it is independent of the handlers attached to it (proving the upgrade point, if standard AX modifies lower level code).
Hope you enjoyed the series. Please leave me a comment, or send me some feedback using the contact form!
There is no comment section here, but I would love to hear your thoughts! Get in touch!
Blog Links

Blog Post Collections
- The LLM Blogs
- Dynamics 365 (AX7) Dev Resources
- Dynamics AX 2012 Dev Resources
- Dynamics AX 2012 ALM/TFS
Recent Posts
-
From Text Prediction to Action
Read more... -
The Killer App
Read more... -
The AI Software Pipeline
Read more... -
The Software In Charge of AI
Read more... -
From Text Predictor to Chatbot
Read more...